Install a Digitrax DN163K0b decoder in Kato F3 A unit
 The
DN123K0b Digitrax is the plug and play decoder for a Kato F3
A. It is very easy to install and doesnt' require any soldering for
the install.
The
DN123K0b Digitrax is the plug and play decoder for a Kato F3
A. It is very easy to install and doesnt' require any soldering for
the install.
Here is how to successfuly install the DN163K0b in the F3 A unit.
Rem: Forgive my english... I'm french!
1 - Preparation
Prepare a clean table to work. You will only need a pair of cizor and some tape.
2 - Installation
2.1 - Remove the frame
 |
| Pict. 1: The frame and the body of the F3 B |
Before you remove the frame you must first remove the coupler. Use a small screwdriver to remove the clip that hold it.
To remove the frame you can use some hard paper or thin plastic sheet that you insert to each side of the frame, then pull it gently. Once the frame is removed you discover the electronic board that is to be replaced by the DN163K0B.
The next step will be to remove the board and the pilot detail.
2.2 - Remove the board and pilot detail
 |
| Pict.
2: The body of the F3 A with the clip removed, before removing the pilot detail and the board. |
This is a very simple step. With a long-nosed plier remove the plastic clip that covers the motor pins. As it might jump when you remove it, be very careful! Then remove the pilot detail (the black piece in front) using a small screw driver.
Once this is done the last step is to gently remove the two power supply coper rod.
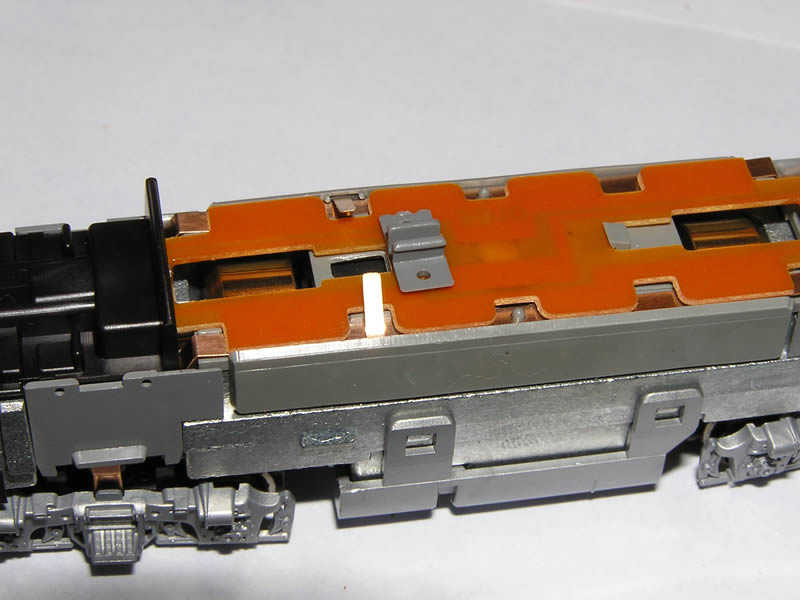
2.2 - Insulate the coper rods
 |
| Pict. 3:
The coper rods have been insulated and placed back before putting the decoder board. |
Gently remove the coper rods and place some of the yellow tape provided with the decoder where the make contact with the motor pins. Be careful to make a good isolation between the pins and the rods. To verify this you can use an ohmmeter.
2.3 - Place the decoder.
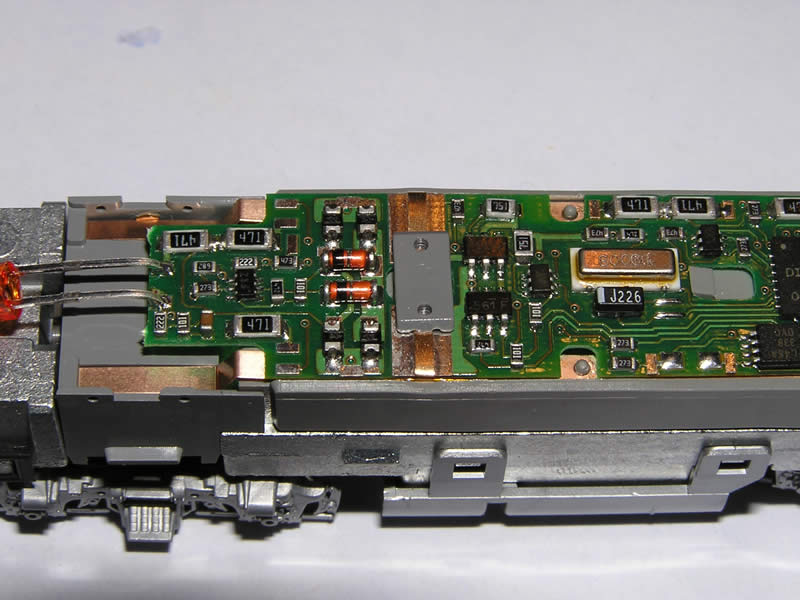 |
| Pict. 4:
Place the decoder and block it with the plastic clip. |
You must now put the decoder and place the plastic clip. Before putting back the frame, test your F3 A unit on the track. First put it on your programming track to check that the decoder is properly installed, then you can run it on the normal track.
2.5 - End of the operation
 |
| Pict. 5: The body is ready to receive the frame |
The last think you can do is to place an additional piece of tape on top of the plastic clip. It will make sure that the clip cannot be removed by itself. Be carefull to place the tape so it cannot be seen through the small glasses on the sides of the frame.
Once this is done you just have to clip back the frame on the body.
Your F3 A is now ready for operation, it's a bit easier than to install the DZ123 decoder in a F3 B unit.